Creating simple SSL certificates for server authentication using OpenSSL
It is often useful to have a standalone and reliable process for provisioning SSL certificates, using an existing CA (internal or public) for use on enterprise servers.
This process makes use of OpenSSL, the Windows binaries for which can be found here: https://slproweb.com/products/Win32OpenSSL.html
Once installed, use an administrative command prompt and navigate to C:\OpenSSL-Win64\bin.
Use the following OpenSSL configuration file (backup the original first) in the bin directory:
Edit line 232 to define the first SAN for the certificate, this should match the common name of your certificate. Add further SAN’s in the subsequent lines.
For example, if my server advertised DNS name is blog.oholics.net, but I also want the root domain to be added as a SAN, then DNS.1 = blog.oholics.net and DNS.2 = oholics.net.
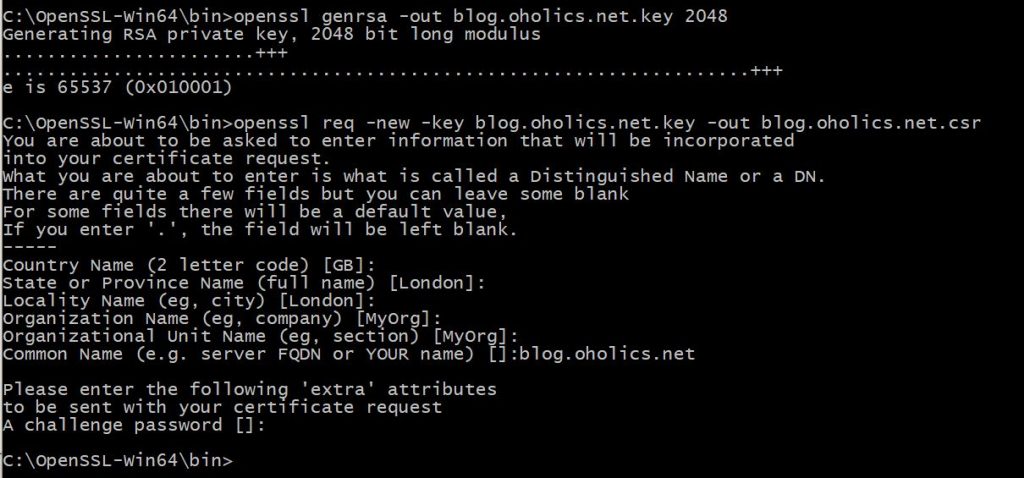
Run the following commands.
Generate the private key:
- openssl genrsa -out blog.oholics.net.key 2048 (note: amend the numbits value as appropriate)
Generate the CSR, amending the country name and other values as appropriate, add the CN of the server when prompted:
- openssl req -new -key blog.oholics.net.key -out blog.oholics.net.csr
Validate the CSR – check that the SAN’s are correct
- openssl req -in blog.oholics.net.csr -noout -text
Once happy, submit the CSR to your CA. Wait for the response, save the file as blog.oholics.net.crt
Now, to combine the certificate file and the private key into a pfx file (providing a secure password when prompted):
openssl pkcs12 -export -out blog.oholics.net.pfx -inkey blog.oholics.net.key -in blog.oholics.net.crt -certfile blog.oholics.net.crt
Use the resulting file as you desire 🙂