Entra ID API Based Inbound Provisioning and Complex Attribute Flows
I’ve been setting up Entra ID and Active Directory API based inbound provisioning in my demo environment recently, using the PowerShell method described here API-driven inbound provisioning with PowerShell script – Microsoft Entra ID | Microsoft Learn. I’ll split this post into 2 parts and will focus only on Entra ID API Inbound Provisioning, as there are only a few differences in AD provisioning – e.g. different attributes and setup of the agent/ CloudSync:
Post setup: Customisation, Lessons Learnt and Troubleshooting
I carried out the initial setup of the enterprise app and manage identity according to the above-mentioned documentation.
Using the example files from the GitHub repo: https://github.com/AzureAD/entra-id-inbound-provisioning/tree/main/PowerShell, I created my own “HR” data file, one line of which is shown here:
I wanted to consume the employee HireDate, LeaveDate, Pronouns, TempLeave and UsageLocation attributes too. However, as these are not part of the default SCIM user definition, I extended my Attribute Mapping file with these extra mappings, using my domain as the identifier “urn:ietf:params:scim:schemas:extension:oholics:2.0:User“. The full mapping file is here:
To consume these custom attributes, you must add them to the Enterprise Application, in the Provisioning section. Tick “Show advanced options” and select “Edit attribute list for API”, add as shown:

Note that the PowerShell script has functionality to automate this process based on the headers of your CSV file, but given that there were only 4 attributes to define, I did it manually.
OK, on to running the PowerShell commands to see the results:
First import the Attribute Mapping file:
$AttributeMapping = Import-PowerShellDataFile .\AttributeMapping.psd1
Then validate the Mapping file and the input CSV file:
.\CSV2SCIM.ps1 -path .\UserSample.csv -AttributeMapping $AttributeMapping -ValidateAttributeMapping
Run the command to process the users in the CSV file (I suggest doing one user at a time until you are confident in your configuration):
.\CSV2SCIM.ps1 -path .\UserSample.csv -AttributeMapping $AttributeMapping -TenantId <MyEntrIDTenantID> -ServicePrincipalId <ObjectIDOfEnterpriseApplication>
Within a few seconds you should see that a new user is provisioned into Entra ID, with all the attributes set. OK all good! If not, check the provisioning log to see some ‘issues’ 😉
Note that my example CSV file has diacritics, as I wanted to see how the application dealt with these. A few of my initial runs (single user provisioning) ran without issue, generally these were those without diacritics, but then I had a few issues that had me stumped for a while.
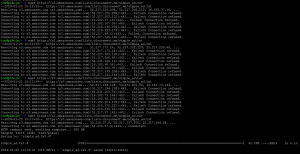
The first error was presented in the provisioning log as:
The primary cause of this error was the format of the CSV file. Make sure that the file is in UTF-8, flipping between UTF-8 and ANSI results in: mastná : mastnÃ
Additionally, I had to modify some flow rules to remove diacritics – notably Mail, MailNickName and UserPrincipalName; these are detailed in the next section.
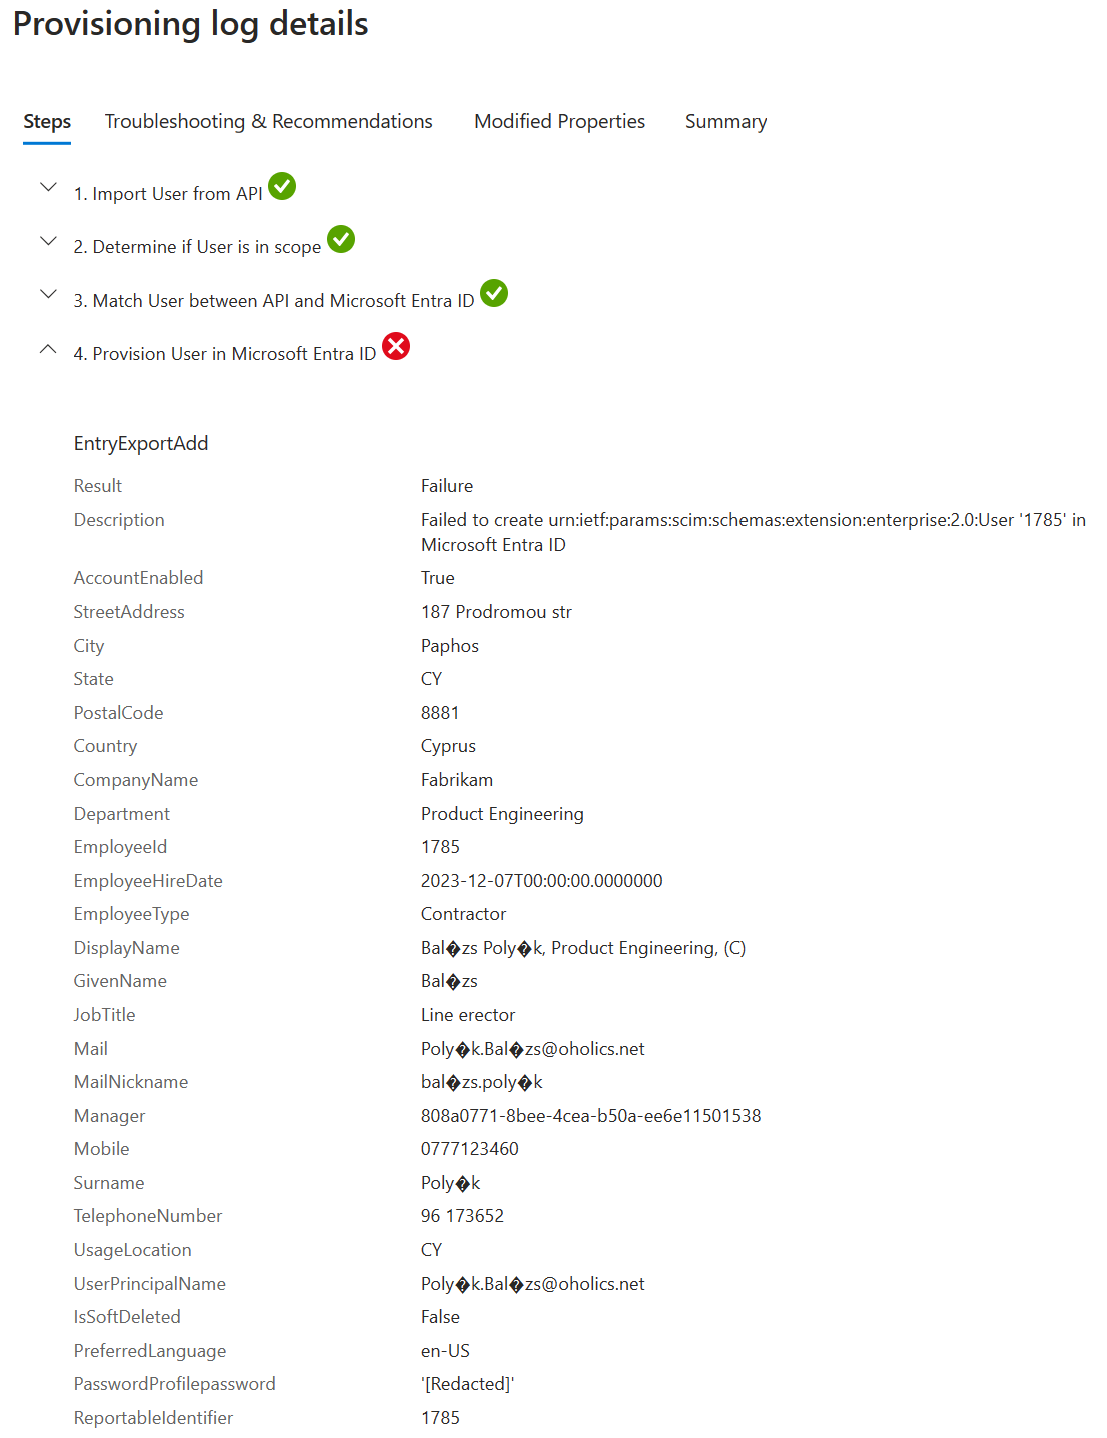
The second error was presented in the provisioning log as:
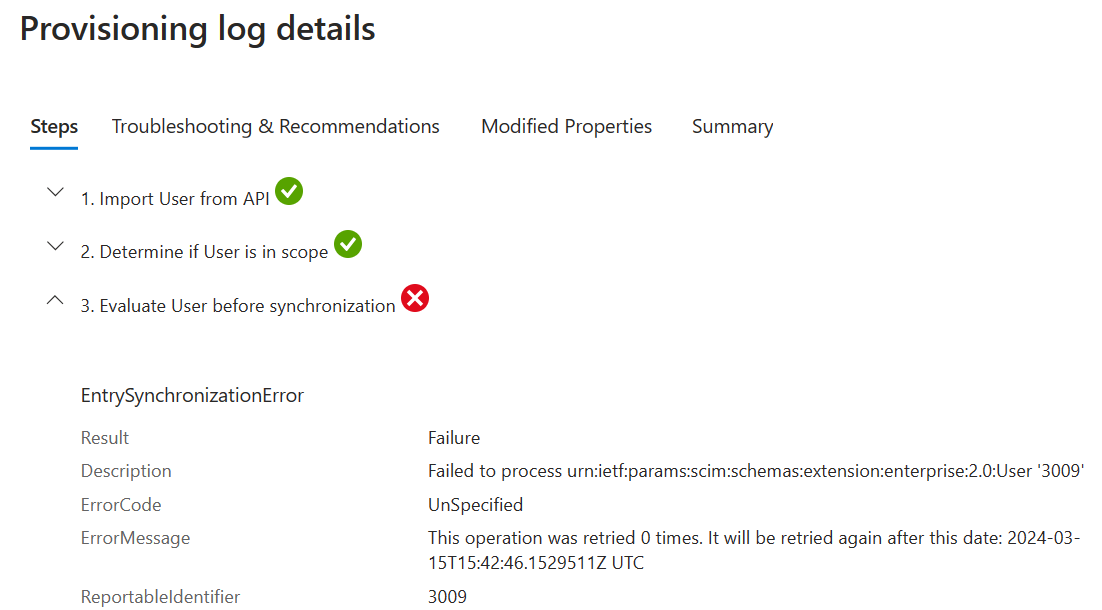
This one was a lot more annoying, but the solution was of course very simple! The error provided no clues, the other provisioning logs in Entra ID did not yield anything useful, so I started picking through each attribute, using a known good example user, who I’d already provisioned. By outputting a json file for the users (good and bad) using the command:
.\CSV2SCIM.ps1 -path .\UserSample.csv -AttributeMapping $AttributeMapping > UserSample.json
I then picked through/ copy and pasted the values between the good and bad user json file and submitted them directly using Graph Explorer – see here for details: https://learn.microsoft.com/en-us/entra/identity/app-provisioning/inbound-provisioning-api-graph-explorer
After exhausting all ‘normal’ attributes, I copied the hiredate and leavedate from my good user example…. it worked!! WTH??? So, what was the difference?
The dates in my good user file happened to have the format 04/03/2011, the dates in my bad user file had the format 19/04/2011, so what is the problem?? The application expects American date formatted dates! So in my good example, the date can be read as UK or US, but in the bad user, the date is clearly UK style. That was painful, especially as after every submission (even using Graph Explorer), you have to wait for a few minutes for the success or failure message to appear.
An example of the output for my test user (as provided in the sample CSV file) is shown (this one is fixed after debugging the issues with date etc.):
Defining more complex attribute flows
The default flows that are provided after configuring the application are OK, but kind of generic and miss some other attributes that you’d typically want to use/ populate (e.g. Usage Location).
Looking at the MSFT documentation https://learn.microsoft.com/en-us/entra/identity/app-provisioning/functions-for-customizing-application-data shows the general rules of the different expressions, but doesn’t provide much guidance on how to combine expressions to meet more complex requirements. I dug around, but couldn’t find any good examples, so I’ll provide some here.
My initial attempt at defining a user Display Name, built from a set of attributes which were present took a while.
Example: Display Name should be: <FirstName>” “<Surname>”, “<Pronouns>”, “<Department>
So the flow needs to check that the attributes are present, else you may end up with a Display Name that looks like: FirstName Surname,, Department
Initially, I tried using the Switch(IsPresent) expression, but kept getting null results, as it only seemed to evaluate the first attribute. I moved onto nested IIF, but again did not get the results that I wanted.
Digging through the issues on the GitHub page https://github.com/MicrosoftDocs/entra-docs/issues/120, I noted reference to https://learn.microsoft.com/en-us/entra/identity/app-provisioning/hr-user-creation-issues, where the use of IgnoreFlowIfNullOrEmpty was suggested. Initial testing of this method was good, with the following resultant flow rule, which joins the attributes only if they exist.
The green section takes the FirstName and Surname and joins them with a Space
The blue section Joins the green section, the Pronouns and the Department with a Comma
Join(“, “, Join(” “, IgnoreFlowIfNullOrEmpty([name.givenName]), IgnoreFlowIfNullOrEmpty([name.familyName])), IgnoreFlowIfNullOrEmpty([urn:ietf:params:scim:schemas:extension:oholics:2.0:User:pronouns]), IgnoreFlowIfNullOrEmpty([urn:ietf:params:scim:schemas:extension:enterprise:2.0:User:department]))
Some more examples:
Email address/ UserPrincipalName:
The green section takes the FirstName and Surname trims any spaces and sets to lowercase (HR Data cleansing) and joins them with a Space
The blue section Appends the domain name to the green section
Append(Join(“.”, Trim(ToLower(NormalizeDiacritics([name.familyName]), )), Trim(ToLower(NormalizeDiacritics([name.givenName]), ))), “@oholics.net”)
MailNickName:
The green section removes diacritics from the userName and sets to lowercase (HR Data cleansing), where userName is defined in the input file as firstname.surname (with diacritics)
The blue section removes any suffixes/ characters after an @ symbol.
Replace(ToLower(NormalizeDiacritics([userName]), ), , “(?<Suffix>@(.)*)”, “Suffix”, “”, , )
Displayname, with a nested IIF statement:
The green section takes the FirstName and Surname and joins them with a Space
The blue section Joins the green section, the Department and the orange section with a Comma
The orange section creates a “(C)” if the user is a Contractor and an “(E)” if the user is an Employee. If the data is missing or not one of those values, then that section of the display name is omitted.
Join(“, “, Join(” “, IgnoreFlowIfNullOrEmpty([name.givenName]), IgnoreFlowIfNullOrEmpty([name.familyName])), IgnoreFlowIfNullOrEmpty([urn:ietf:params:scim:schemas:extension:enterprise:2.0:User:department]), IgnoreFlowIfNullOrEmpty(IIF([userType]=”Contractor”,”(C)”,IIF([userType]=”Employee”,”(E)”,””))))
Depending on how happy you are with your input HR data, you could go a bit crazy with data hygiene. From my FIM/ MIM days, I got burned so many times with bad HR data, I got in the habit of always performing hygiene on my import flows. That’s all for now.
 Below is a copy of the script showing all of the permissions that I had to remove (note all the commented permissions lines) before being able to create the role.