After sorting through the data that I obtained from the collection script, removing duplicates, etc. The result set was slightly messier than I expected, quite a few manually added entries and incorrect ones.
Anyway, to get the bulk of the changes implemented, I’m just targeting the large expected set – those with VPN settings labelled SITE1 PPTP and SITE1 VPN (anonymised…). Those with SITE2 PPTP have the settings, that were previously enforced by another script, have them enforced here too. This script will take the place of the existing one.
New machines, who do not have the settings already have them defined. Anyway here it is:
So this is not directly relevant to FIM per se, but it falls under the kind of IdM/ Authentication umbrella, so I thought it belonged here….
In December 2014, I bought a Yubikey Neo. I wanted to see how it could be used to harden access to some sensitive “stuff”.
These are really cool devices; they are relatively inexpensive (~£36), yet provide a bunch of functionality all on one device, some of which I have not used.
The components that I did use were:
Yubico OTP – the One Time Passcode functionality that is present OOB – used to sign into the Yubico Forums
U2F – I use this for 2FA for my Google accounts and this blog – it is very simple to set up this 2FA method across multiple services. Look here for more information: https://www.yubico.com/applications/fido/
SmartCard (PIV) – this was the part that I was really interested in for securing stuff within the enterprise. I had recently installed a Windows PKI Infrastructure, so used that to generate trusted SmartCard Logon Certificates to install onto the devices. Look here for configuration docs: https://developers.yubico.com/yubico-piv-tool/
As with most of these things the documentation was initially difficult to read, there were various command line tools to manage different aspects of the Yubikeys, some of them had bugs at the time.
Anyway, long story short, back then I got it configured just how I wanted and used it daily ever since. However, just before Christmas, the SmartCard certificate that I had generated the previous year expired. Thus, the SmartCard functionality of the Yubikey became invalid.
I generated myself a new certificate from my CA, then came to try to remove the old certificate from one of my Yubikeys. I could not because I needed to authenticate against the device to carry out this action. The authentication string (aka password) is called the Management Key, that is (should be) changed from the default value when configuring the device. I went on the scrounge trying to find the key for this particular device, I found my old notes (command line dumps) from the previous year, there were a few management Keys within but not one for this particular device.
OK, so now I need a new management key….. The docs use dd to generate the key:
At the time, I didn’t have easy access to a Unix system to do this, but more importantly I wanted to find a way to achieve the same result in Windows, using PowerShell. This would allow me to script the whole process. Here is the script to create the management key (For info about what “{0:X2}” means, look here: http://www.powershellmagazine.com/2012/10/12/pstip-converting-numbers-to-hex/)
I have now re-written a script that I put together last year to add initialise a new or reset Yubikey (with PIV support) and add a user SmartCard certificate from a Windows CA:
While looking to get this working: https://github.com/shield-9/u2f-login/, I was seeing errors in the http logs referring to OPENSSL_VERSION_TEXT. These were being generated by the following lines in the u2f.php file:
After running a few more tests, it seemed that this PHP Constant should have been defined, but was not. Goggling didn’t provide any quick answers, but I soon worked it out for myself.
In the php.ini file (under arch in /etc/php/), uncomment the line: “extension=openssl.so” and restart httpd. Once the extension is enabled, the Constant is then available.
In the end I did not use this plugin, I was unable to register my Yubikeys. The plugin seems to have been superseded by this one: http://github.com/georgestephanis/two-factor/. In order to have the ability to use U2F login using this plugin, the openssl.so extension has to be enabled; otherwise, the U2F login option is not available.
Recently, one of my co-workers was assigned to work with me to learn some FIM and to help, where possible, with some configuration.
One of the things on my list of “things to do” was to find a way of hiding certain portal buttons from a normal users view – after all they are not (currently) going to be allowed to use the portal for any self service task yet – that might come later….
So, I sent my co-worker off to find and implement the solution in the test environment, thinking “It can’t be that hard…”
This was done around 1 month ago and already I’m forgetting the actions that were carried out, so I’m going to document the steps in a more verbose fashion here for future reference.
Create new search scopes, using the original Search Scopes’ values as the basis. The resource type shold be “Resource”.
I had already setup a new Usage Keyword “PrivilegedUsers”, that I was using to control the things that the helpdesk users would see to do their admin tasks. So, in the original search scopes this keyword needs to be added and the BasicUI and GlobalSearchResult keywords should be removed. Then in the (new) copies of the search scopes, BasicUI and GlobalSearchResultshould be present.
Original and New Search Scope Usage Keywords:
Do an IIS reset….
Now on the home page, choose one of those new search scopes and do a “blank” search. Copy the URL that this search went to – note that the UI of this search presents only the details button.
Do the same thing for each of the new search scopes, copying the URL’s for later….
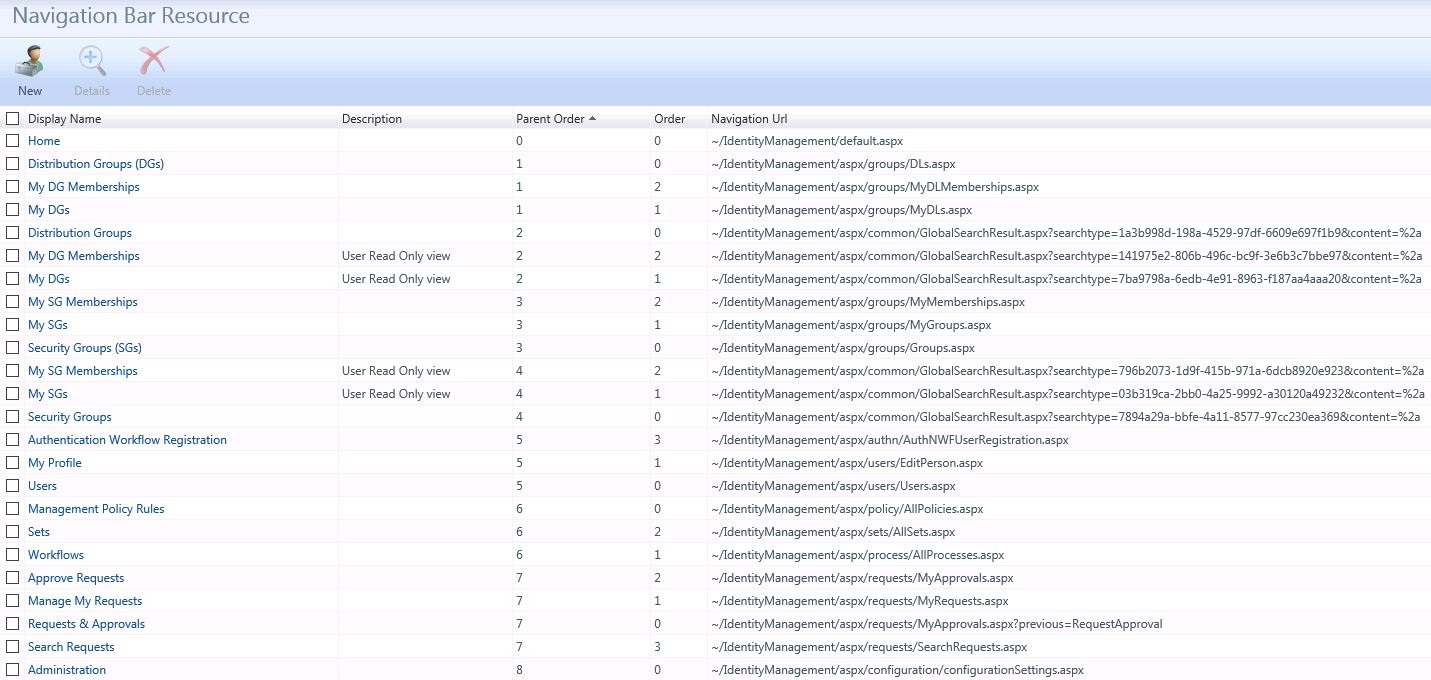
Now we need to make those URL’s available via the portal UI. We need to do this for both the Navigation Bar and Home Page, so create new resources, using the information within the originals as the basis. The only change that I made was to remove the reference to (DGs) and (SGs) for the top level items and to add a description “User Read Only view” for those new items with the same name (so that I could tell the difference):
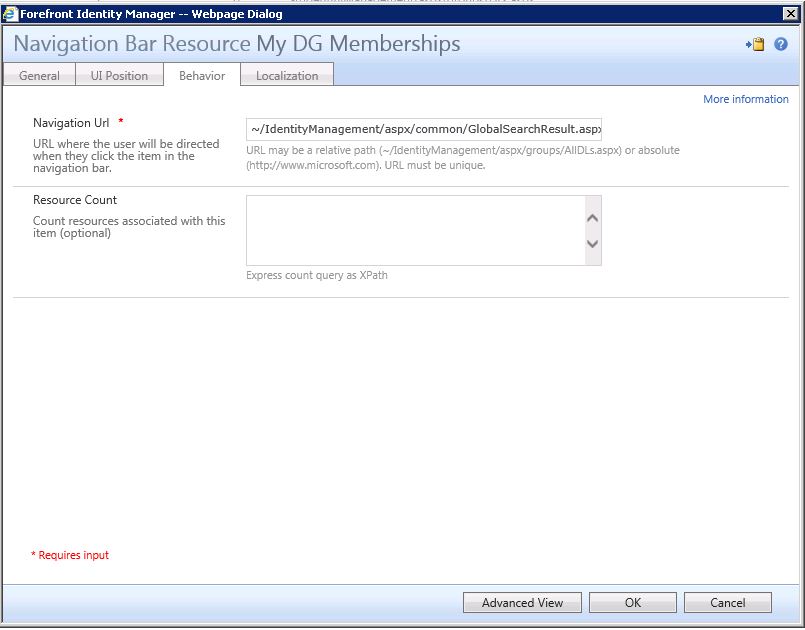
Use the URL’s that were obtained from the search scopes to define the behaviour of the Resource:
Do an IIS reset….
If you copied the Parent Order and Order values of the original Resources, the result is a little messy from the Administrators POV, as all of those items are crammed together. Unfortunately, I know of no way to hide an item from the admin, so I just rearranged the order of the layout. It displays as follows after re-arranging both the Nav Bar and Home Page Resource orders:
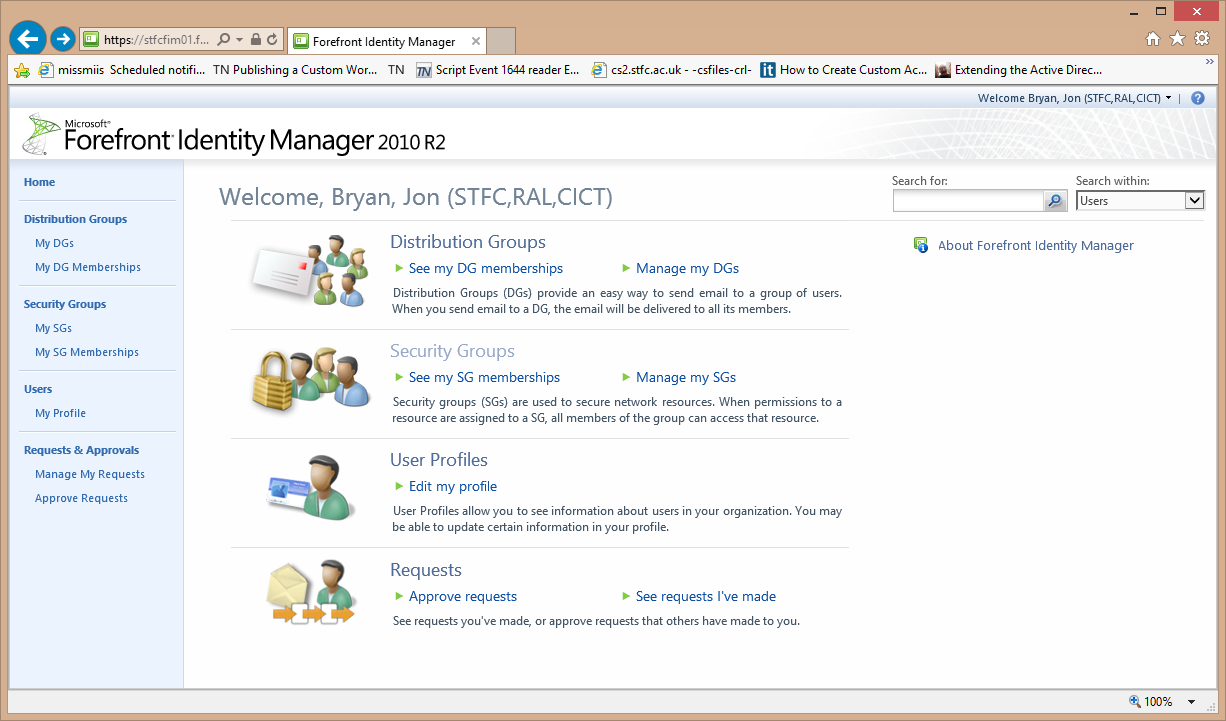
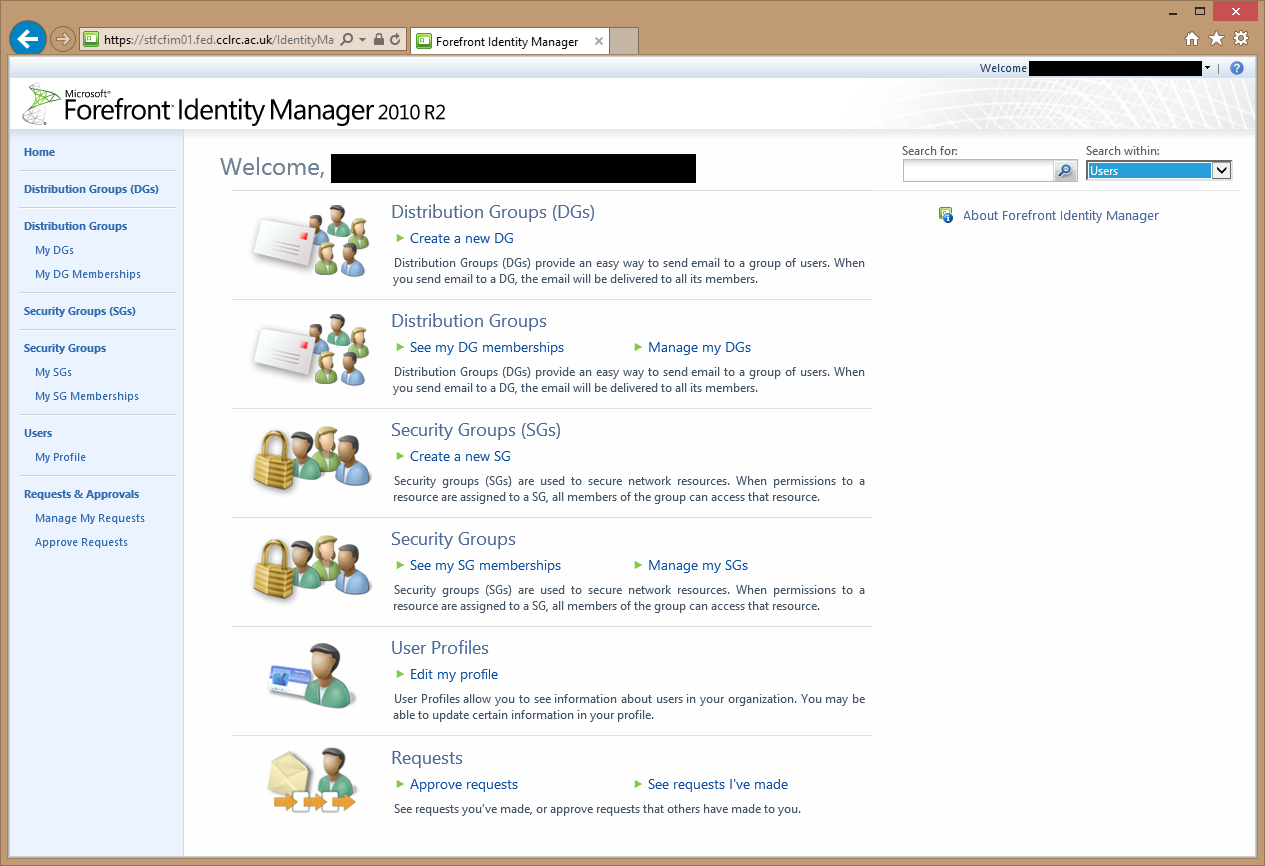
A normal user looking at the portal sees this, the links go to the URL’s in those Search Scopes defined earlier:
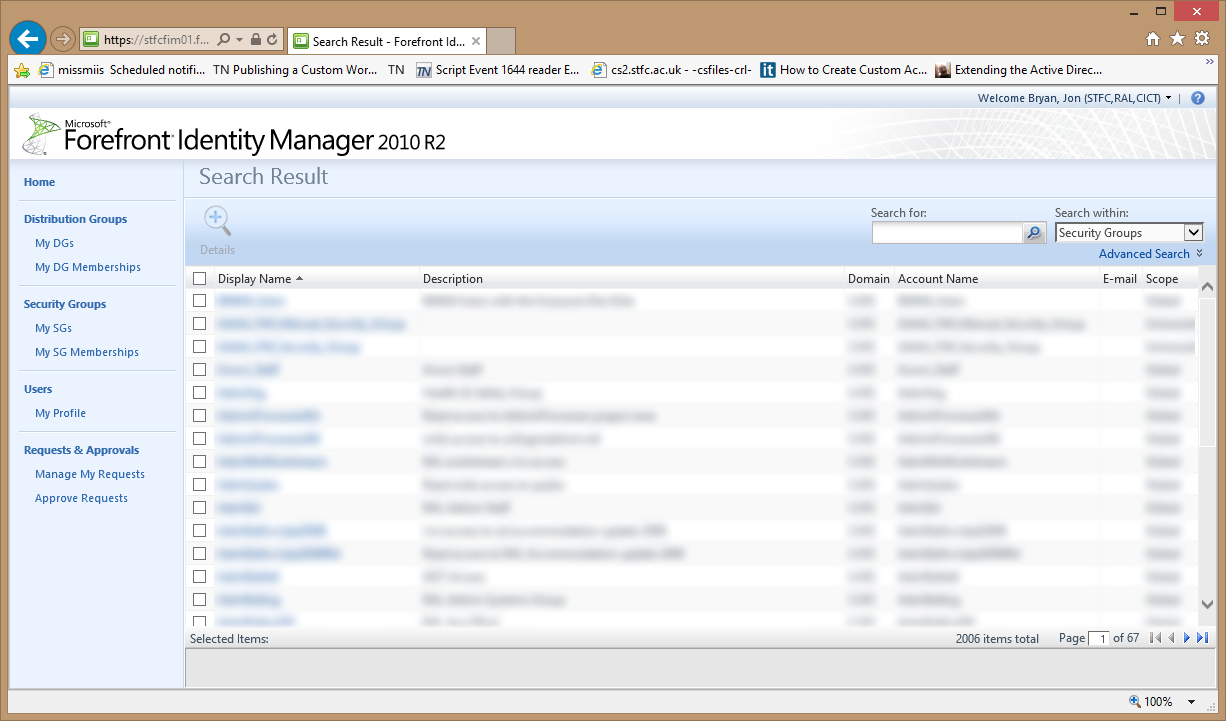
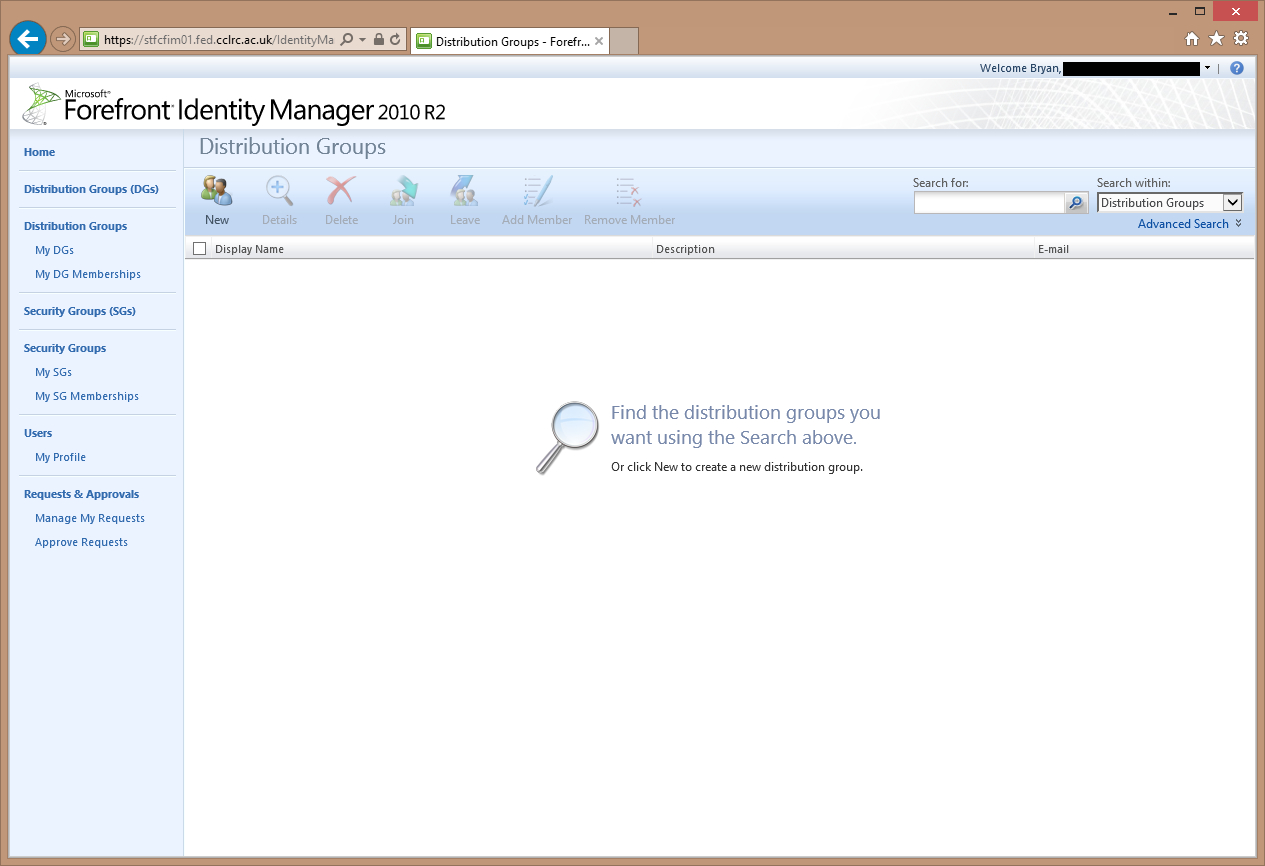
And when looking at for example “Distribution Groups”, sees that Details button only:
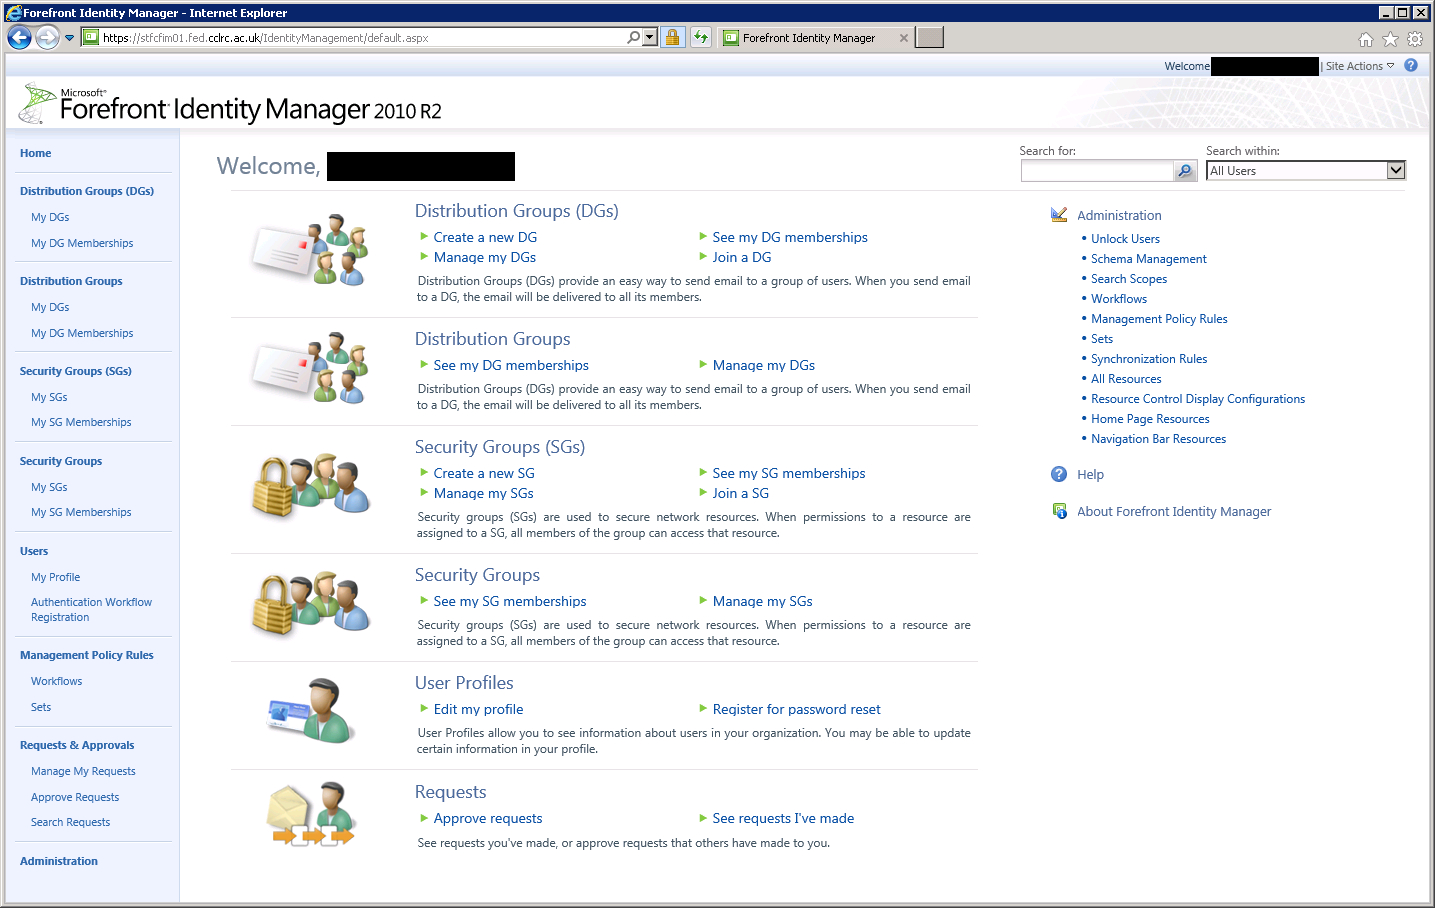
The PrivilegedUsers view, looks like this:
And if a member of PrivilegedUsers uses the Distribution Groups (DGs) link, they see this – note all of the buttons are available:
If I remember missing something or something not being quite right, I’ll be back to correct…
In my Organisation, not all users have a mailbox, while others are just mail enabled.
In order to define XPATH filters for those people who should be allowed into a distribution list, managed by the portal, I needed to set a flag.
This boolean flag defines if they could be mailed and therefore should belong to a distribution list.
A nice add on was the fact that it allowed me to check the mail suffix of the user as part of the import process. Only those suffixes defined in the array are allowed, only suffixes that the Exchange Organisation is authoritative for. This check exists, because sometimes people just add a new suffix, or make a typo – this bit of code highlights those events.
As I have said previously, the HR data that feeds FIM is out of my direct control and has had some data quality issues.
As a result, I have ended up putting some consistency checking into my code. I’ll present a few from my MVExtension here, what I’m tending to be looking for is where the user has already been provisioned, but then the reference has been deleted in HR, but no-one has told me so that I can tidy up the account in AD and FIM.
The ID’s that showed up after putting in the bit looking for FIM only references, was caused by disconnecting a table that validates historical end dates. I was assured that I would not need it anymore, because the end dates would not be randomly set to a period in the past that mean that I would never receive that update… However, this did not pan out, so I re-attached the table, but did not reset the MV object deletion rule afterwards, so I ended up with ID fragments in the portal – referenced only by ObjectID.
Again I used the Lithnet PowerShell module to clear these up. There were around 40 to do, so I just got the ObjectID’s from the job xml, put them in a text file and ran this:
I now have a new script the does that same task but uses AD groups to hold the licence entitlements. I have placed a copy of the script below.
One thing of note (a bug), that will be present in the previous script, is that of assigning a licence that is in conflict with an already applied license. This issue arose while testing this new script, notably for users who were being entitled to a Project licence.
During processing, I was seeing errors like “Conflicting Service Plans: SHAREPOINTWAC_EDU, SHAREPOINTWAC_EDU” and “Conflicting Service Plans: SHAREPOINTSTANDARD_EDU, SHAREPOINTENTERPRISE_EDU”. Where this part was present in both of the license collections – the one already applied and the project license that was to be applied.
The solution is messy, but does work.
First the “base” user licence “STANDARDWOFFPACK_FACULTY” must be removed, and then replaced by the same license, but with more disabled components – in this case EXCHANGE_S_STANDARD, SHAREPOINTSTANDARD_EDU and SHAREPOINTWAC_EDU. Once that is complete and verified, then try to apply the complete Project license.
So, now we have gone full circle! There is now a need to remove the proxy settings from one of those VPN connections described in the last post.
For the machines that are supported within my group, the settings should be consistent, but there is the possibility that extra settings have been added by the user. So, I did a little discovery first:
The resultant file shows mostly what I’m expecting to see, with a few other things like Vodafone dongles, user defined connections etc.
Removal can be easily carried out by trimming the setting script (from the last post) to no longer publish the one to be removed, then use a GPP item to remove the key relating to the VPN proxy settings, to be removed.
For those other groups, within the organisation, who do not have such consistency; the results of the script can be analysed in Excel to see what is “out there”. Then another (not yet written script – because I don’t think I’ll need it) can be used to find those binary values which match those that are to be removed and then subsequently remove them.
A number of years ago, I rationalised the way that IE proxy settings were delivered to supported systems. Previously, this had been done via installation scripts, which were not enforced after application, so were prone to subsequent error.
To achieve consistency and ease of deployment Group Policy was used. Back then there were Internet Explorer Maintenance GPO settings, which allowed the LAN Proxy setting to be deployed easily. However, I also wanted to make consistent the delivery of VPN settings. This was also achieved by using Group Policy to deliver a VPN address book (rasphone.pbk) to the clients.
In order to get the correct proxy settings assigned to those VPN connections, I used a little scripting.
First, find out on my test machine what the text in the IE proxy GUI translated to, where I had already setup the VPN connections and set the correct proxy settings:
Then use the results of that to create a new vbs script to be pushed out as a User login script:
Part of the process of getting the script in the previous post working was having a record of who is licenced *now*.
This was done using the following script. Note that the commented lines must be un-commented to log the data, I am currently using this script to keep the AD groups up to date , hence the Add-ADGroupMember lines are uncommented. AD groups will soon be replacing the text files.